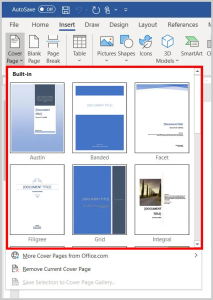
A well-designed cover page is essential for reports, essays, and other documents to make a good first impression. Word has several features that make it easy to customize a polished, professional cover page that perfectly complements your work. In this tutorial, I’ll walk through the steps for making an appealing cover page in Word.
Introduction
A cover page serves as the title page and introduction for a document. It typically includes:
- Title of the work
- Author name
- Institution or publisher
- Publication date
Benefits of a professional cover page:
- Presents key details upfront
- Allows creativity in design
- Makes a good first impression
- Looks complete and polished
To create a great cover page in Word, follow these key steps:
- Set up the layout
- Add cover page elements
- Apply formatting
- Customize header/footer
- Save as a reusable template
Let’s look at each of these in more detail. With the right layout and formatting, your cover page will impress!

Step 1: Set Up the Cover Page Layout
First, open a new blank Word document for your cover page. Go to Layout and adjust the page size, orientation, and margins as desired.
Consider using wider margins for a more spacious layout. Change orientation to landscape if you want the page horizontally.
Step 2: Add Cover Page Elements
Next, insert the key details that should appear on your cover page. This typically includes the title, subtitle, author name, date, and any other relevant information.
Make the title bold and enlarged. Center all text on the page. You can arrange elements creatively, for example placing the title vertically.
Step 3: Apply Formatting
Now it’s time to format the text and visual elements. Choose complementary fonts, colors, and designs that match your document’s style.
Consider adding graphical borders, background colors or images, watermarks, and other decorative touches to make your cover page stand out.
Step 4: Customize Header/Footer
Most cover pages also include a header or footer section with information like the title or page numbering.
Double click the header or footer to open it and insert text or graphical elements as desired. This repeats at the top or bottom of each page.
Step 5: Save as a Reusable Template
Once your cover page design is complete, save it as a Word template for easy reuse. This allows you to quickly update it for future documents.
Open the template and customize the details for the new cover page. Change graphics, colors, and text as needed to match the document.
With these steps, you can create a professionally designed and formatted cover page that perfectly introduces your work and leaves a great first impression.


