Introduction
A banner is a visual display that combines text, images, and design elements to capture attention and convey a message. Banners are widely used for various purposes, such as advertising, event promotion, or branding. While specialized design software is often associated with banner creation, Microsoft Word offers powerful tools that allow you to create professional-looking banners with ease.
Benefits of creating banners in Word:
- User-friendly interface and familiar tools
- Robust text formatting and layout options
- Seamless integration with other Microsoft Officeapplications
- Cost-effective solution compared to specialized design software
- Ability to create print-ready and digital versions of your banner
The banner creation process in Word involves several stages, from setting up the document layout to designing the content, enhancing visual impact, and finalizing the banner for printing or digital publishing. By following this step-by-step guide, you’ll learn how to create eye-catching banners that effectively communicate your message and leave a lasting impression.
Part 1: Setting Up the Banner Document

1.1. Choosing the Right Word Version and Template
The first step in creating a banner in Word is to ensure you have a compatible version of the software and select the appropriate template.
Compatible Word versions for banner creation: While most recent versions of Word support banner creation features, it’s recommended to use Word 2013 or later for the best experience. These versions offer advanced formatting tools and better compatibility with printing and publishing platforms.
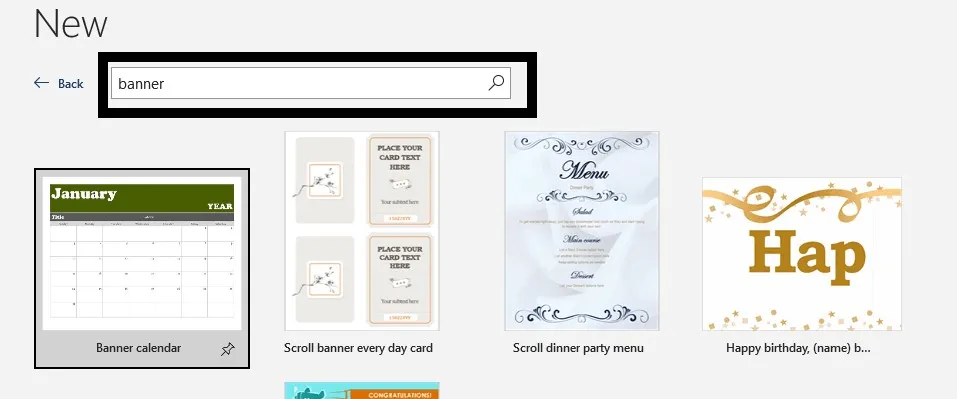
Using built-in banner templates or creating a custom template: Word provides several built-in templates specifically designed for banners and other large-format displays. These templates come pre-formatted with layouts, placeholders, and design elements tailored for banner creation. Alternatively, you can create a custom template from scratch or modify an existing one to suit your specific needs.
Adjusting page size and orientation: Choose the appropriate page size and orientation for your banner. Word allows you to select from standard banner sizes or create a custom size that fits your requirements. Consider the intended use of the banner (print or digital) when selecting the page dimensions.
1.2. Determining Banner Dimensions
Before starting your banner design, it’s essential to determine the appropriate dimensions to ensure your banner looks professional and fits its intended purpose.
Considering the banner’s intended use (print, digital, etc.): The dimensions of your banner will depend on whether it’s intended for print or digital use. For printed banners, consider factors like the available print size and the viewing distance. For digital banners, consider the display resolution and aspect ratio.
Setting the appropriate width and height: Once you’ve determined the intended use, set the appropriate width and height for your banner. Standard banner sizes range from small desktop banners (e.g., 468×60 pixels) to large outdoor banners (e.g., 3×6 feet or larger).
Adjusting page margins and layout: In Word, adjust the page margins and layout settings to accommodate your desired banner dimensions. This will ensure that your design elements and text fit within the banner area without any cropping or distortion.
Part 2: Designing the Banner Content
2.1. Text Formatting and Layout
Effective text formatting and layout are crucial for creating a visually appealing and readable banner.
Selecting attention-grabbing fonts and styles: Choose fonts and styles that are bold, legible, and appropriate for the banner’s purpose. Consider using contrasting colors or larger font sizes for headlines and important text to draw attention.
Aligning text and using text boxes: Align text elements consistently across the banner, ensuring a balanced and organized layout. Use text boxes to position text precisely and maintain proper spacing between elements.
Incorporating taglines or slogans: If your banner includes a tagline or slogan, ensure it’s prominently displayed and complements the overall design. Experiment with different font styles, sizes, and positioning to make it stand out.
2.2. Working with Images and Graphics
Images and graphics can significantly enhance the visual appeal of your banner and help convey your message more effectively.
Inserting and positioning images and graphics: Add relevant images or graphics to your banner by inserting them directly into the document or linking them from external sources. Position them strategically using Word’s layout and alignment tools.
Adjusting image size and resolution: Ensure that your images are sized appropriately for the banner dimensions and have sufficient resolution to maintain quality when printed or displayed digitally.
Creating transparent backgrounds for images: To seamlessly integrate images with your banner design, consider creating transparent backgrounds for them. This can be achieved by using external image editing software or Word’s built-in tools for removing backgrounds.
2.3. Adding Design Elements
Incorporating design elements can help elevate the visual impact of your banner and make it more engaging.
Using shapes, lines, and borders for visual interest: Word offers a variety of shapes, lines, and borders that you can use to create visual separation, emphasis, or decorative elements within your banner design.