Introduction
A word cloud is a visual representation of text data, where the size of each word is proportional to its frequency or importance within the text. Word clouds are incredibly useful tools for quickly summarizing large bodies of text, identifying key themes, and presenting information in an engaging and visually appealing way.
Benefits of using word clouds:
- They provide a quick overview of the most prominent words or topics in a text.
- They help identify patterns and trends in textual data.
- They present complex information in a simple and easy-to-understand format.
- They can be used for data visualization, brainstorming, content analysis, and more.
Word clouds have a wide range of applications, including:
- Analyzing customer feedback or survey responses
- Summarizing research papers or articles
- Creating visually appealing presentations or reports
- Generating creative designs for posters, logos, or marketing materials
- Visualizing key themes in social media conversations or online discussions
Prerequisites
Before you can create a word cloud in Microsoft Word, you’ll need:
Microsoft Word version: Word 2010 or later versions should work seamlessly with the WordCloud add-in. If you’re using an older version, you may need to upgrade to a more recent release.
Installing WordCloud add-in: The WordCloud add-in is a third-party tool that enables you to create word clouds directly within Word. You can download the add-in from the official source: https://wordclouddragons.com/
Step 1: Preparing Your Text
The first step in creating a word cloud is to prepare your text data. This involves collecting and organizing the text you want to visualize, as well as formatting it properly for the WordCloud add-in.
Collecting and organizing your text data: Gather the text you want to represent in your word cloud. This could be a single document, multiple files, or even text copied from websites or other sources. Make sure to collect all the relevant text in a single location.
Formatting the text: The WordCloud add-in works best with plain text files, so you’ll need to remove any unnecessary formatting, such as line breaks, tabs, or special characters. You can use a text editor like Notepad or TextEdit to clean up your text file.
Saving the text file: Once you’ve cleaned up your text, save it in a compatible format, such as .txt or .docx. The WordCloud add-in supports various file types, so choose the one that works best for your workflow.
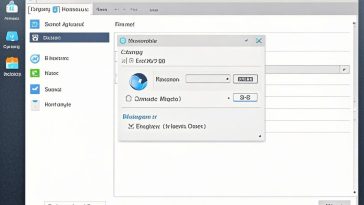
Step 2: Installing the WordCloud Add-in
Next, you’ll need to install the WordCloud add-in for Microsoft Word. Follow these steps:
Downloading the add-in: Visit the official WordCloud website (https://wordclouddragons.com/) and download the latest version of the add-in compatible with your Word version.
Step-by-step installation guide: The installation process may vary slightly depending on your Word version, but generally, you’ll need to follow these steps:
- Open Microsoft Wordand navigate to the “File” menu.
- Select “Options” (or “Word Options” in older versions).
- In the Word Options dialog box, click on “Add-Ins” or “Trust Center.”
- Follow the prompts to install the WordCloud add-in from the downloaded file.
- After installation, you should see the WordCloud add-in listed in the Word ribbon or menu.
Step 3: Creating Your Word Cloud
With the WordCloud add-in installed, you’re ready to start creating your word cloud:
Opening the WordCloud add-in: Launch Microsoft Word and locate the WordCloud add-in, usually under the “Insert” or “Add-Ins” tab in the ribbon.
Importing your text file: Click on the WordCloud add-in and follow the prompts to import your prepared text file. You can also paste your text directly into the add-in if you prefer.
Adjusting word count settings: The WordCloud add-in allows you to control the number of words displayed in the cloud. You can set a minimum and maximum word count, or use the default settings.
Removing unwanted words: If there are specific words you don’t want to include in your word cloud, you can remove them using the “Remove Words” feature in the add-in.
Customizing the word cloud: Once you’ve imported your text, you can customize the appearance of your word cloud to suit your preferences:
- Changing the layout: Choose from different layout options, such as horizontal, vertical, or circular arrangements.
- Selecting color schemes: Apply pre-defined color schemes or create your own custom color palette.
- Adjusting font styles and sizes: Experiment with different font families and sizes to achieve the desired look and feel.
- Applying Word effects: Add visual effects like shadows, outlines, or textures to make your word cloud stand out.
Step 4: Finalizing and Exporting the Word Cloud
Once you’re satisfied with your word cloud design, it’s time to finalize and export it:
Previewing the word cloud: Use the preview feature in the WordCloud add-in to ensure your word cloud looks exactly how you want it.
Adjusting the size and resolution: Adjust the size and resolution of your word cloud to fit your intended use case, such as a presentation slide, report, or high-resolution image.
Exporting options: The WordCloud add-in provides several export options:
- Saving as an image: Save your word cloud as a high-quality image file, such as PNG or JPEG, for use in other applications or on the web.
- Inserting the word cloud into your Word document: If you want to include the word cloud in a Word document, you can insert it directly from the add-in with a single click.
Tips and Tricks
To get the most out of your word cloud creation experience, here are some tips and tricks:
Best practices for text preparation: Thoroughly clean and format your text data for optimal results. Remove unnecessary characters, line breaks, and formatting that could interfere with the word cloud generation.
Optimal word cloud settings for different use cases: Experiment with different layout, color, and font settings to find the perfect combination for your specific use case, whether it’s a presentation, report, or creative design.
Creative ways to use word clouds: Word clouds aren’t just for data visualization; they can also be used in presentations, reports, infographics, and even as creative design elements for logos, posters, or marketing materials.
Troubleshooting Common Issues
While creating word clouds in Word is generally straightforward, you may encounter a few common issues:
Handling large text files: If you’re working with extremely large text files, the WordCloud add-in may struggle to process the data. In such cases, consider breaking down the text into smaller chunks or using external text analysis tools to identify the most relevant words before importing them into the add-in.
Resolving add-in compatibility issues: Occasionally, you may encounter compatibility issues between the WordCloud add-in and your Word version. In such cases, try updating to the latest version of Word or contact the add-in developer for support.
Dealing with formatting errors: If you notice formatting issues or unexpected behavior in your word cloud, double-check your text file for any hidden characters or formatting that may be causing conflicts. You can also try copying and pasting the text directly into the add-in instead of importing a file.
Conclusion
Creating word clouds in Microsoft Word is a powerful way to visualize and summarize textual data. By following the steps outlined in this tutorial, you can easily install the WordCloud add-in, import your text data, and customize the appearance of your word cloud to suit your needs.
Word clouds are versatile tools that can be used in a variety of contexts, from data analysis and brainstorming to creative design and presentations. Don’t be afraid to experiment with different settings, color schemes, and layouts to find the perfect word cloud representation for your project.
Remember, the key to creating effective word clouds is to start with clean, well-formatted text data and take advantage of the customization options offered by the WordCloud add-in. With a little practice and creativity, you’ll be able to create stunning word clouds that effectively communicate your message and captivate your audience.
So, what are you waiting for? Install the WordCloud add-in, gather your text data, and start creating visually appealing word clouds that bring your content to life!