

Introduction
The American Psychological Association (APA) style is a widely used citation style, particularly in the social sciences. Many academic papers, dissertations, and research publications require APA format, which specifies guidelines for structuring the paper, citing sources, and presenting references. Fortunately, Microsoft Word has built-in tools that can help you easily implement APA formatting in your documents.
Setting Up APA Format in Word
The first step is to access the Style options in Word. Depending on your version of Word, you can either go to the Home tab and select the “Style” option or navigate to the Format menu and choose “Style.” Once you’re in the Style pane, you can select the APA style template or create a new APA style.
If you’re using a recent version of Word, you may find an APA style template under the “Built-In” or “Citation Style” categories. If not, you can create a new APA style by clicking the “New Style” button and configuring the settings according to the APA guidelines. This includes adjusting the font (Times New Roman, 12-point), line spacing (double-spaced), and margins (1-inch on all sides).
Formatting the Title Page
The title page is an essential component of an APA-formatted document. Here’s how to create a proper title page:
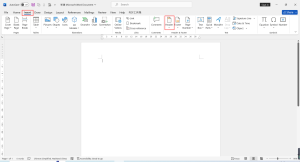
Insert a running head at the top of the page, which includes a shortened version of your paper’s title and the page number. To do this, go to the Insert tab and click “Header.” In the header area, type “Running head: SHORTENED TITLE” and insert a page number using the “Page Number” option.
Center the full title of your paper on the next line, using uppercase and lowercase letters. The title should be no more than 12 words long.
On the line below the title, center your name.
On the next line, center the name of your institution or university.
Insert a page break by going to the Insert tab and clicking “Page Break” to start the main body of your paper on a new page.
Structuring the Main Body
In the main body of your APA-formatted paper, you’ll want to use heading styles to organize your content. Word provides built-in heading styles (Heading 1, Heading 2, etc.) that you can apply to different section levels. Use Heading 1 for the main sections, Heading 2 for subsections, and so on.
Adjust the paragraph formatting according to APA guidelines. This includes indenting the first line of each paragraph by 0.5 inches and using double line spacing throughout the document.
If you’re including images, tables, or figures, make sure to insert them with proper captions. You can use the “Caption” feature in Word to automatically generate and number these elements.
In-Text Citations
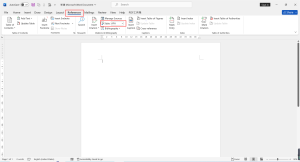
One of the most critical aspects of APA formatting is properly citing your sources within the text. Word’s References tool makes it easy to insert author-date citations as you write.
Position your cursor where you want to insert the citation.
Go to the References tab and click “Insert Citation.” If you haven’t added your sources yet, you can do so by clicking “Add New Source.”
Select the appropriate source type (book, journal article, website, etc.) and fill in the required information.
Word will automatically generate the in-text citation in APA format.
Remember to handle different citation scenarios correctly, such as multiple authors, direct quotes, and sources with missing information.
The References List
After inserting all your in-text citations, you’ll need to generate a References list at the end of your document. Word can automatically create this list based on the sources you’ve cited.
Go to the References tab and click “Bibliography” or “Insert Bibliography.”
Select the appropriate citation style (APA) and choose whether you want to include all sources or only those cited in the document.
Word will generate the References list, sorted in APA order.
Review the reference entries to ensure they are formatted correctly and make any necessary edits. If you add or remove citations from your document, you’ll need to update the References list accordingly.
Formatting Tips and Troubleshooting
Even with Word’s built-in APA formatting tools, you may encounter some issues along the way. Here are a few tips and troubleshooting suggestions:
If your page numbers are misaligned or not appearing in the correct location, check the header settings and ensure the “Different First Page” option is unchecked.
If your paragraph indentation is incorrect, adjust the “First Line Indent” setting under the Paragraph options.
Use Word’s built-in grammar and style checkers to identify and fix any formatting or style issues.
Consider installing APA-specific add-ins or templates, which can provide additional formatting assistance and ensure compliance with the latest APA guidelines.
Additional Resources
While this guide covers the essential steps for APA formatting in Word, you may want to refer to authoritative APA style guides and resources for more detailed information or specific scenarios:
- The official Publication Manual of the American Psychological Association (7th edition)
- The APA Style website (https://apastyle.apa.org/)
- Online APA style guides and tutorials from reputable academic institutions
Conclusion
Implementing APA format in Word can seem daunting at first, but with the built-in tools and resources available, it becomes a manageable task. Follow the steps outlined in this guide, practice formatting your documents, and don’t hesitate to seek additional help or resources if needed. Proper APA formatting is essential for academic writing, and mastering it will ensure your papers are polished and professional.


 No products in the cart.