Presentations are powerful tools for communicating ideas, sharing information, and leaving a lasting impression on your audience. However, static slides can sometimes feel dull and fail to capture your audience’s attention. This is where animations come into play. By incorporating well-crafted animations, you can breathe life into your PowerPoint presentations, making them more engaging, memorable, and effective.
Section 1: Getting Started with PowerPoint Animations
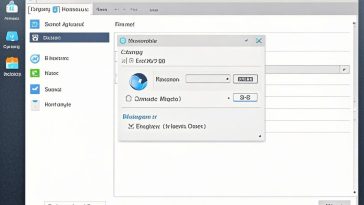
The first step in creating animated PowerPoint presentations is to familiarize yourself with the Animation Pane. This pane is your command center for all animation-related tasks. To access it, navigate to the “Animations” tab on the ribbon and click the “Animation Pane” button.
In the Animation Pane, you’ll find a variety of animation effects categorized into four main groups:
- Entranceeffects make objects appear on the slide (e.g., Fade, Wipe, Fly In).
- Emphasiseffects draw attention to specific objects (e.g., Spin, Grow/Shrink, Color effects).
- Exiteffects make objects disappear from the slide (e.g., Fade Out, Wipe Out, Fly Out).
- Motion Pathsallow you to move objects along customized paths.
To apply an animation, simply select the object(s) you want to animate, then choose the desired effect from the Animation Pane. You can preview the animation by clicking the “Play” button in the pane.
Section 2: Mastering Animation Timings and Triggers
Once you’ve applied animations to your objects, you’ll want to control when and how they occur. PowerPoint offers several options for timing and triggering animations:
Timing Animations
- On Click: The animation occurs when you click the mouse or press the keyboard’s “Enter” or “Space” key.
- With Previous: The animation plays immediately after the previous animation on the same slide.
- After Previous: The animation plays after a specified delay following the previous animation on the same slide.
To adjust the timing of an animation, select it in the Animation Pane, then choose the desired option from the “Start” drop-down menu. You can also fine-tune the animation duration and delay using the respective settings in the “Timing” group on the ribbon.
Triggering Animations
In addition to timing animations, you can also set up triggers that cause animations to occur based on specific actions. For example, you can set an animation to play when you click on a particular object or navigate to a specific slide.
To set up a trigger animation, select the animation in the Animation Pane, then click the “Trigger” button in the “Timing” group on the ribbon. From there, you can choose the trigger type (e.g., On Click, On Mouse Over) and set the corresponding options.
Section 3: Advanced Animation Techniques
As you become more comfortable with PowerPoint animations, you can explore advanced techniques to create truly captivating presentations:
Creating Complex Motion Paths
While PowerPoint offers a selection of pre-defined motion paths, you can also create custom paths to make objects follow unique routes across your slides. To do this, select the object you want to animate, then click the “Motion Path” button in the “Animation” group on the ribbon. From there, you can choose a pre-defined path or draw your own using the provided tools.
Animating SmartArt Graphics and Charts
PowerPoint’s SmartArt graphics and charts can also be animated to highlight key points or reveal information in a more engaging manner. To animate SmartArt or charts, select the individual components you want to animate, then apply the desired animation effects from the Animation Pane.
Utilizing the Animation Painter Tool
The Animation Painter tool is a handy feature that allows you to copy animation effects from one object and apply them to others with a single click. This can be particularly useful when you want to maintain consistency across multiple objects or slides.
To use the Animation Painter, select the animated object whose effects you want to copy, then click the “Animation Painter” button in the “Animations” group on the ribbon. Your cursor will change to a paint bucket icon. Simply click on the objects you want to apply the animation to, and they’ll inherit the same effects.
Section 4: Enhancing Your Animations
While animations can make your presentations more visually appealing, adding sound effects and multimedia elements can take them to the next level:
Adding Sound Effects and Background Music
Sound effects and background music can set the tone for your presentations and reinforce key points or transitions. To add sound, navigate to the “Insert” tab on the ribbon and click the “Audio” button. From there, you can choose to insert an audio file from your computer or record your own narration.
Incorporating Multimedia Elements
PowerPoint also allows you to embed multimedia elements like videos and GIFs directly into your slides. To insert a video, navigate to the “Insert” tab and click the “Video” button, then choose the desired video file from your computer or a online source. For GIFs, you can either insert them as images or embed them as videos, depending on your preference.
Applying Transitions Between Slides
In addition to animating objects within slides, you can also add transitions between slides to create a smoother and more cohesive presentation experience. To apply a transition, navigate to the “Transitions” tab on the ribbon and choose the desired effect from the available options. You can preview the transition by clicking the “Preview” button in the ribbon.
Section 5: Best Practices and Tips
While animations can be powerful tools for capturing your audience’s attention, it’s important to use them judiciously and with a clear purpose in mind. Here are some best practices and tips to keep in mind:
Maintain Visual Consistency and Branding: Use consistent animation styles, colors, and fonts throughout your presentation to reinforce your brand and create a cohesive experience.
Avoid Animation Overload: Too many animations can be distracting and overwhelming for your audience. Use them sparingly and only when they truly enhance your message.
Test and Fine-tune Your Animations: Before presenting to your audience, take the time to test your animations and make any necessary adjustments to ensure they run smoothly and as intended.
Section 6: Saving and Sharing Animated Presentations
Once you’ve created your animated PowerPoint presentation, you’ll want to save and share it in a format that preserves your animations:
Saving as a PowerPoint Show (.ppsx)
To save your presentation as a self-running PowerPoint Show, go to the “File” menu, then choose “Save As.” In the “Save as type” drop-down menu, select “PowerPoint Show (.ppsx).” This format will retain all your animations and allow you to run the presentation without the need for PowerPoint itself.
Exporting Animations as Videos
If you need to share your animated presentation in a video format, PowerPoint provides an option to export your slides as a video file. Navigate to the “File” menu, then choose “Export” and select “Create a Video.” From there, you can adjust video settings like resolution, quality, and timing, then choose the desired output format (e.g., MP4, WMV).
Embedding Animations in Web Pages or PDFs
In some cases, you may want to embed your animated PowerPoint presentations directly into web pages or PDF documents. To do this, you’ll need to save your presentation as a Windows Media Video (.wmv) or a GIF animation file, then follow the appropriate steps to embed the file in your desired platform.
Conclusion
Incorporating animations into your PowerPoint presentations can be a game-changer, elevating your content and captivating your audience like never before. By following the techniques and best practices outlined in this tutorial, you’ll be well on your way to creating visually stunning and highly engaging animated presentations.
Remember, the key to successful animations is striking the right balance between creativity and restraint. Use animations to highlight your most important points and guide your audience through your presentation, but avoid overwhelming them with too many flashy effects.
As you continue to develop your animation skills, don’t be afraid to experiment and push the boundaries of what’s possible with PowerPoint. Embrace feedback from your audience and continuously refine your techniques to create truly memorable and impactful presentations.