It’s hard to look at the Windows software that’s served you well for years and decide that it’s time for a Windows upgrade. Most of the time, it’s difficult to know where to start or how the process works.
However, whether you’re upgrading from Windows 10 to Windows 11 Pro, or realizing that it’s time to move on from your trusty Windows 7, it’s a move that will pay off.

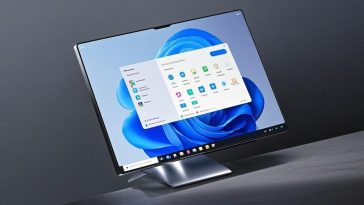
Why Upgrade?
Both Windows 10 and Windows 11 Home or Pro pack a processing punch, and is the top choice for both consumers and businesses across the globe. Compared to its older counterparts, they are lightning-fast, super efficient, and come with much-improved productivity and multitasking tools.
As of 2024, Statcounter’s data shows that a majority of PCs worldwide still run Windows 10, while a growing number of businesses and individuals continue to upgrade to take advantage of Windows 11’s cutting-edge capabilities.
For gamers, Windows 11 offers DirectStorage, reducing load times in supported games by up to 40%. Business users gain from tighter security integrations, such as hardware-based isolation for sensitive data. The redesigned taskbar and Start menu improve overall usability, making everyday tasks faster and more intuitive.
Windows 10, on the other hand, remains a reliable choice for users with older hardware or specific software requirements. It’s compatible with most legacy systems and still receives extended security updates/support until October 2025.
And it pays to upgrade. Windows 11 Pro is Microsoft’s most up-to-date version, following the end of Windows 10 support.
Upgrading from Windows 7 to Windows 11 directly isn’t typically possible due to significant system requirements and changes in architecture. However, you can upgrade to Windows 11 by first moving to Windows 10 and then upgrading to Windows 11. If your PC meets Windows 11’s stricter hardware requirements, you’ll be able to complete the upgrade process smoothly.
This guide is designed for users currently running Windows 7 who want to upgrade to Windows 10. Microsoft ended official support for Windows 7 in 2020, which means no more security updates or bug fixes. This upgrade will ensure that your PC remains secure and performs well with new features
Windows 7 to Windows 10 Upgrade Guide
- System Check: Before starting, check if your PC meets the minimum hardware requirements for Windows 10.
- Processor: 1 GHz or faster
- RAM: 2 GB minimum
- Storage: 20 GB minimum
- Backup Your Data: Use tools like Windows Backup or an external hard drive to back up your files.
- Stable Internet Connection: You’ll need an internet connection for the upgrade.
Upgrade Steps
Step 1: Verify Your Current Version
- Click on the Start Menu → Settings → System → About.
- Confirm that you’re running Windows 7 by checking the Windows edition.
Step 2: Use the Windows 10 Media Creation Tool
- Go to the official Windows 10 download page.
- Download and run the Media Creation Tool.
- Choose Upgrade this PC now and follow the prompts.
- This tool will automatically check your system for compatibility.
Step 3: Complete the Installation
- After downloading the necessary files, the upgrade will begin.
- The system will reboot multiple times during the process, so save any work before starting.
Step 4: Activate Windows 10
- After installation, you’ll need to activate Windows 10. You can do this with your current Windows 7 product key.
- Go to Settings → Update & Security → Activation.
- If prompted, enter your Windows 7 product key to activate Windows 10.
Step 5: Post-Upgrade Setup
- Once activated, check for updates by navigating to Settings → Update & Security → Windows Update to install any pending updates.
Windows 10 to Windows 11 Upgrade Guide
- System Check: Ensure your PC meets the following minimum requirements:
- Processor: 1 GHz or faster with at least 2 cores
- RAM: 4 GB or more
- Storage: 64 GB or more
- TPM 2.0: Trusted Platform Module for enhanced security
- Back Up Your Files: Even though the upgrade shouldn’t affect your files, it’s wise to back up your important data to avoid any risks.
- Stable Internet Connection: You’ll need an active Internet connection to download the necessary files.
Upgrade Steps
Step 1: Check for Compatibility
- Run the PC Health Check Tool (available on Microsoft’s website) to check if your device is eligible for Windows 11.
Step 2: Update Windows 10
- Go to Settings → Update & Security → Windows Update.
- Make sure your system is fully updated before proceeding with the upgrade to Windows 11.
Step 3: Upgrade to Windows 11
- Stay in Settings → Update & Security → Windows Update.
- If your system is eligible, you will see the option to Download and install Windows 11.
- Alternatively, use the Windows 11 Installation Assistant or the Media Creation Tool to initiate the upgrade.
Step 4: Restart and Complete Setup
- Once the files are downloaded, your PC will reboot several times.
- After the upgrade, check for any additional updates and install them by going to Settings → Update & Security → Windows Update.
Step 5: Verify Activation
- Go to Settings → Update & Security → Activation to check that Windows 11 is activated.
- If needed, enter a valid Windows 10 Pro or Home product key.

Common Windows Upgrade Issues
Issues are bound to pop up when upgrading your Windows system. Here are a few solutions.
1. Insufficient Disk Space
Free up space by deleting temporary files or moving data to an external drive. Tools like Disk Cleanup can help.
2. Compatibility issues
If your system isn’t compatible, consider running a dual-boot setup or virtual machine with the new OS while maintaining your current one.
3. Slow Performance
Ensure all drivers are updated, and consider a clean installation if performance issues persist.
Why I Upgraded
I owned a Windows laptop for many years, and I was completely content with Windows 7. It ran without issues, and I saw no reason to make the upgrade.
Boy, I was wrong.
I loved the simplicity, but I should have given the lack of security updates and Windows support a little more thought.
One day, I was working on a freelance project and encountered an unexpected crash. Losing hours of work was a wake-up call. I soon decided to upgrade to Windows 10 Pro, and didn’t look back. Not only did I gain peace of mind with BitLocker’s encryption, but features like Cortana and improved multitasking sealed the deal for me. Today, I’m on Windows 11 Pro, and I couldn’t be happier with the streamlined user experience.
FAQs
Q: Can I upgrade from Windows 7 directly to Windows 11?
No, you’ll first need to upgrade to Windows 10 and then to Windows 11.
Q: How much does a Windows Pro license cost?
A Windows 11 Pro license costs around $199, but you can save more than 70% on Onebyonesoft.
Q: Will upgrading erase my files?
No, but it’s always best to back up your data before starting.
Conclusion
Whether you choose a Windows 11 Upgrade or stick with Windows 10, the upgrade process isn’t as hard as it seems. Even though your older versions may work for now, it’s always better to upgrade and not take any chances.